Functionalities manual
Information technology solutions that make it possible to implement a scalable, solid and reliable computing architecture in a hybrid cloud.
Introduction
This document consists of a manual with a brief description of the main functionalities contained in the Data Center Interconnect - DCI product, from the uCloud platform.
Presentation
Data Center Interconnect - DCI is a connectivity solution which the network is defined by software.
The network defined by software (a SDN) is a network architecture that allows a more efficient management and control of the network resources, it separates the control plan from the data plan.
In uncomplicated terms, it means that the network data and control functions are separated, which allows greater flexibility and automation on the network management.
How to login on DCI
To have access to the platform it is necessary to have made a “First purchase” on the Customer Panel.
After this purchase the user receives their access credentials, sent directly to their registered email.
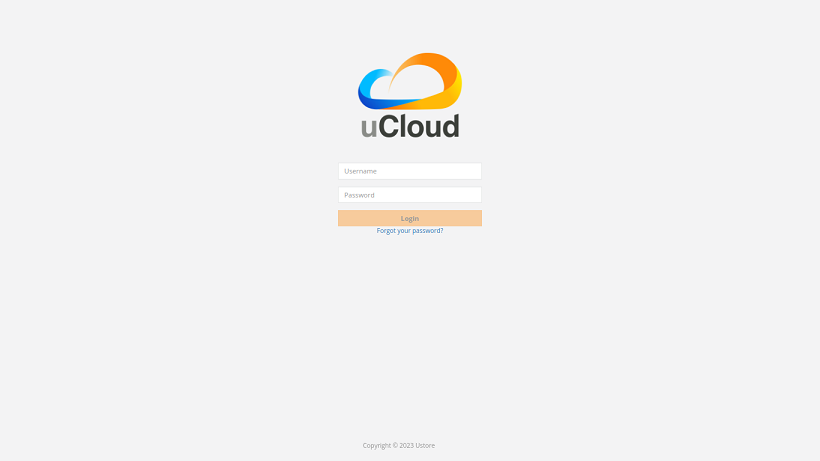
The user must fill out the login and password blanks, with the credentials received from the platform’s administrator.
Click on the Login In button.
After this procedure, the portal home screen is presented.
General view
At first, it is important to understand the impact of some tools existing on the top right menu, shown to the user after their login on DCI.
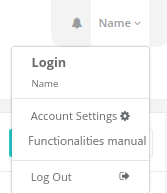
The following figure is a cut out of the superior right menu, displayed in all the screens available to the user. This menu shows relevant components such as name, email, account settings, access to this functionalities manual and logout, each one described in detail next.
Name;
Email;
Account settings;
Access to this functionalities menu;
Logout.
Notification icon  : This icon is a relevant point for viewing all the activities done on the portal. Through it, it is possible to observe the most recent actions, reflected as notification on the “Tasks” screen.
Name: Displayed the name of the logged user and their email address.
Account settings: Makes it possible to access the created account details, where it is possible to change the email, phone and manage the users in your Company. This button directs to the Administration menu.
Functionalities manual: Directs the user to the “functionalities menu” document stored in Ustore Brasil online documentation environment
Logout: end session or log out of the application.
Administration menu
For the complete view of the DCI services there are some menus on the left side of the platform, in them it is possible to find valuable information to the product.
When accessing the Administration menu it is possible for the user to operationalize the submenus:
Users;
Groups;
Companies.
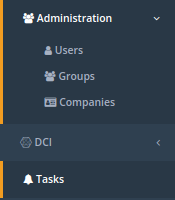
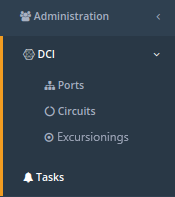
DCI Menu
This menu contains a submenu that makes it possible to view:
Ports;
Circuits;
Excursionings.
In the sequence each one of the submenus is detailed.
Ports submenu
This submenu makes it possible to view the ports resources, beyond that, it is possible to observe the actions available such as include disabled resources when listing, search an information, update the screen after changes and six columns that categorize each one of the ports. The ports are connected through the Circuits, they can or not have circuits, all of the ports are inside the Datacenter, when purchasing the port, the client receives the LOA (letter of authorization) it is necessary for the process flow.
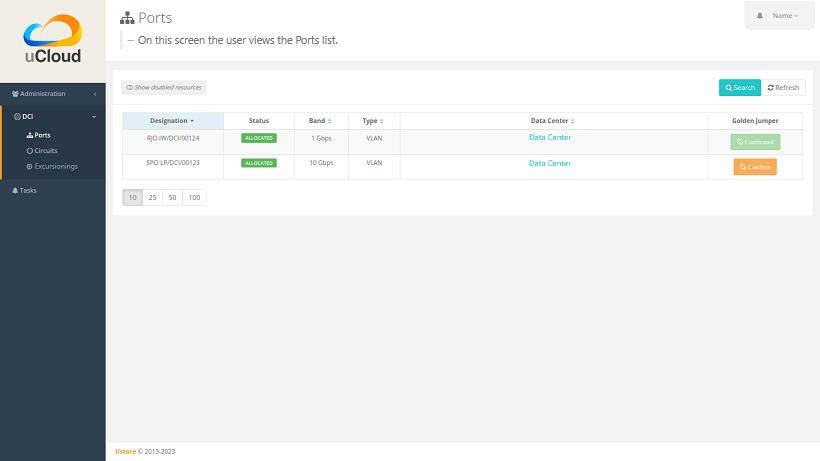
Three functionalities are presented:
The button to
Include disabled resources: when clicking on this button the user can view the resources that are deactivated;The
Searchaction: symbolized by the magnifying glass that indicates to the user the possibility of search;The option to update the page when clicking on
Refresh.
The ports information, are divided in six columns and presented, as mentioned above:
Designation
Status
Band
Type
Datacenter
Golden Jumper
When selecting a port, it is possible to view the details completely, this new page presents in its header some options actioned by the buttons to Back, Download LOA, Resend LOA and the Confirm button, on the screen body are distributed on the card described in the sequence.
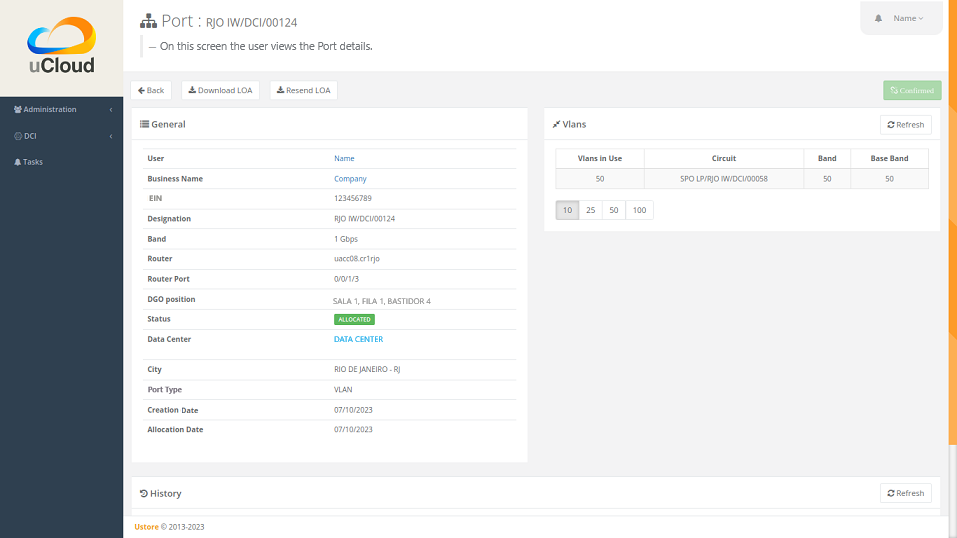
The Ports submenu shows three cards categorizing relevant information:
General;
Vlans;
History.
General card
This card is contained on the Ports submenu, on the DCI menu. It presents the main information of this Port.
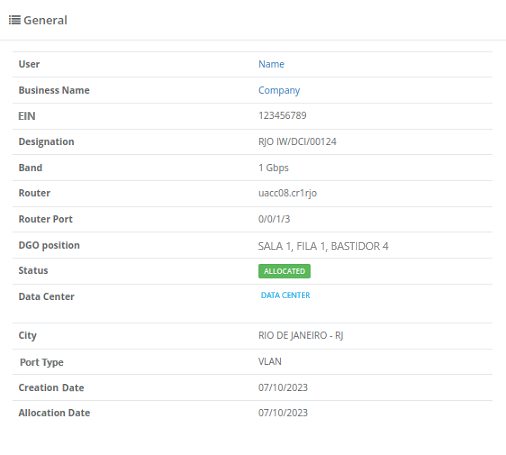
After filling out the fourteen elements, listed on the sequence, they must show a general overview to the user, including the creation date and this port allocation, as shown on the example above:
User;
Company name;
EIN;
Designation;
Band;
Router;
Port router;
DGO position;
Status;
Datacenter;
City;
Type of port;
Date of creation;
Date of allocation.
Card Vlans
The second card shown in this Ports submenu, located on the right side of the screen, besides the information it contains a green-colored action button.

The Vlans card displays on the superior right side a page update functionality that can be actioned by the Refresh button, then the information are divided into four columns:
Vlans in use;
Circuits;
Band;
Baseband.
The information about Vlans are shown in blocks of 10, 25 or 50 lines.
Circuits submenu
This screen allows to view the Circuit’s resources, making it possible to observe the actions to be taken with each item, distributed in buttons and columns.
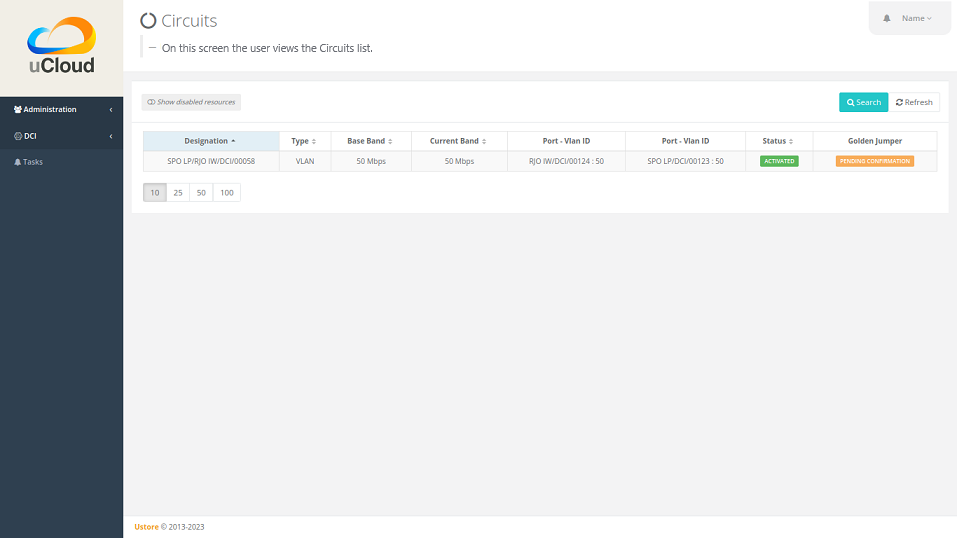
On this screen, initially can be seen that the actions available by the application, such as include disabled resources, search an information, update the screen after proceed alteration and eight columns that categorize the information about each one of the circuits.
Three functionalities are presented:
The button to
Include disabled resources: When clicking on this button the user can view the resources that are deactivated;The
Searchaction: the magnifying glass symbol indicates to the user the action to search for something;Refreshbutton: indicates that when clicking on this button the page is updated.
On the sequence, the circuits screen displays separately the eight informative columns, listed below:
Designation;
Type;
Baseband;
Current Band;
Port - Vlan ID;
Port - Vlan ID;
Status;
Golden Jumper.
When clicking on each circuit individually, it is possible to view the information details, starting by the button with the Back action, the General card, Settings card, Excursionings card and finally, the History card.
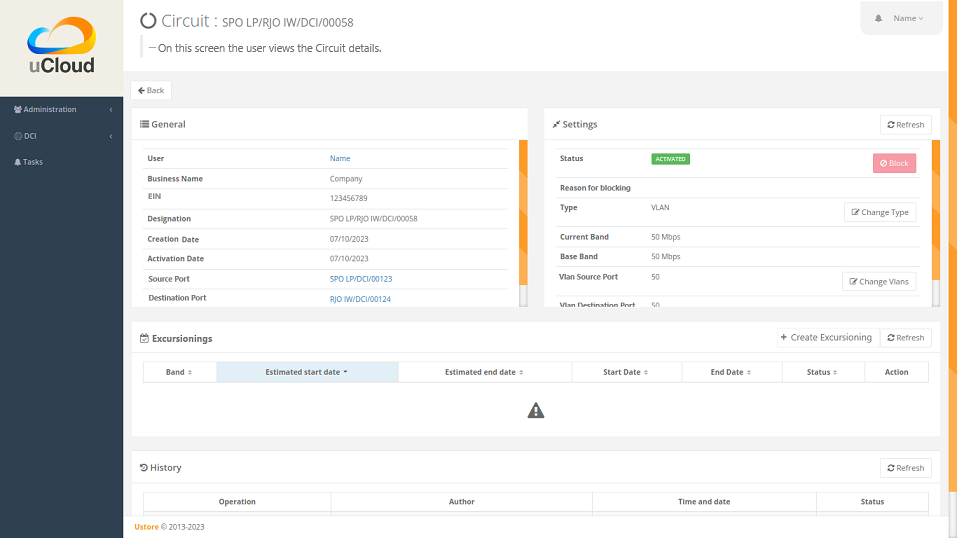
In this listed circuit detailing, the user views four cards that categorize distinct information.
General;
Settings;
Excursionings;
History.
General card
This card is contained on the Circuits submenu, it presents its main information.
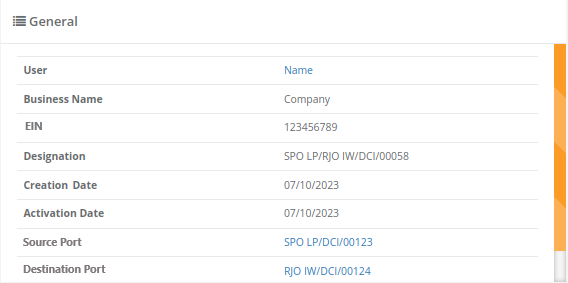
Composed of eight elements as shown on the example above, they reflect the circuit’s general overview to the user, including the ports that are connected through the circuit, listed on the sequence:
User;
Business name;
EIN;
Designation;
Date of creation;
Date of activation;
Source port;
Destination port.
Settings card
The second card of the Circuit submenu, presents its main information.
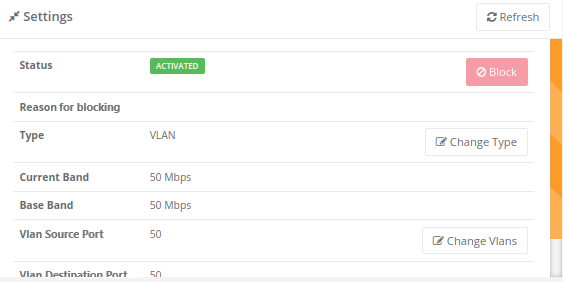
The settings card makes available the functionality to update the page on the right superior side of the page, it can be action on the Refresh button. This card makes available some information such as:
Status: “Enabled” and on the sequence the
Blockbutton;Reason for blocking;
Type and sequence on the button to
Change type;Current band;
Vlan source port and on the sequence the
Change vlansbutton;Vlan destination port.
Excursionings card
The third card of the Circuits submenu, presents its main information.

When viewing the Excursionings card, it is allowed to use the two buttons located on the right, they are: + Create excursioning and Refresh. This card displays seven columns containing information such as:
Band;
- Estimated initial time;
Estimated end time;
Initial time;
End time;
Status;
*Action.
History card
The last card on the Circuits submenu, it presents the following information about the history of actions done:
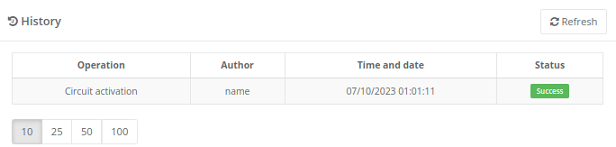
Operation;
Author;
Date and Time.
By the end a block is displayed with the action to select the information in blocks of 10, 25, 50 or 100 lines.
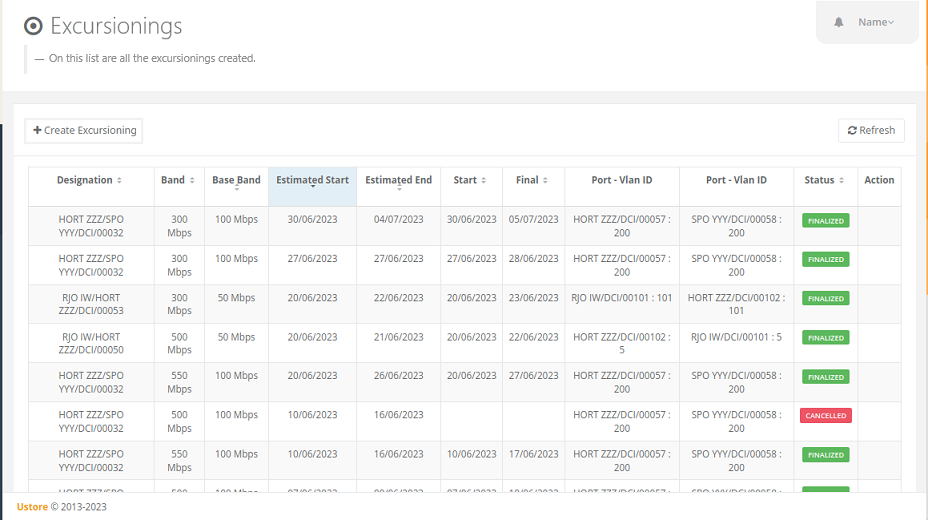
Excursionings submenu
General card
This submenu allows the visualization of Excursionings: finished, stopped, pending, scheduled or enabled by the user.
On it it is possible to check beyond the excursioning status, the quantity of band to be expanded on the circuit and its baseband, having the estimated start and end date and the dates in which the excursioning actually happened or finished, the ports and their Vlans are also available for viewing.
On this screen are displayed the options for both functionalities:
Refreshbutton: when clicking on this button the page is updated;+ Create Excursioningaction button: the plus sign indicates the user that when clicking on it they can create something.
To schedule a excursioning is necessary to click on the + Create excursioning button and fill out the blanks on the presented modal.
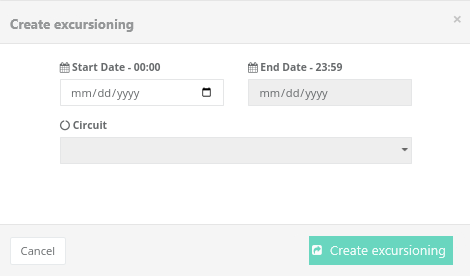
When viewing this new modal to create excursioning, the user observes the following:
Start time;
End date and time;
Circuit.
On the “start date” the user can select the intended date for the beginning of this excursioning scheduling and the desired date for its end. Besides informing on the following space about which circuit this excursioning must be executed.
After filling out these data it is shown to the user the selected circuit base capacity, beyond the maximum capacity possible for that circuit and the “Band” blank that allows to select the estimated band, according to the following image:
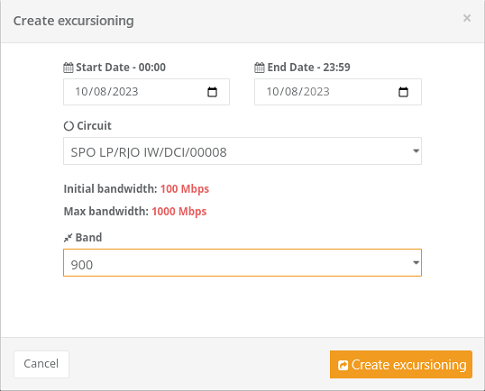
When completing the needed data insertion, the user can click on the Create excursioning button and follow to the next step of this flow.
Nota
The Cancel button can be actioned at any time, in case of giving up of this creation.
After the excursioning is created, the operation is complete. It makes it possible for the user to check it on the “Excursioning” menu with all its information, as well as the option to cancel such excursioning.
Task menu
On the task tab it is possible to track all the operations performed within the platform.
Task panel
As mentioned above, the tasks screen is important to track the progress of the purchases made on the platform.
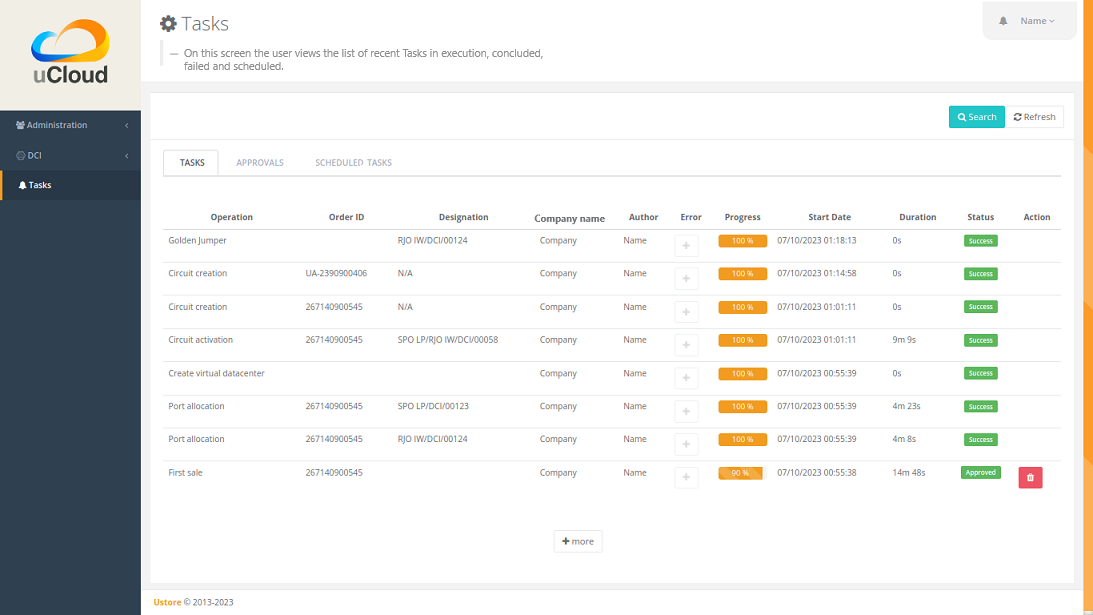
This menu makes it possible to view any error case, track the orders status and cancel some operations.

The screen above presents on the superior right part the tasks symbol, the username logged in, and then the functionalities:
Searchbutton: Blank that makes it easier to find information with agilityRefreshbutton: Allows to update the page with a single click.
The tasks are presented in a list format, categorized in tabs containing the information about:
Tasks;
Pending approvals;
Scheduled tasks.
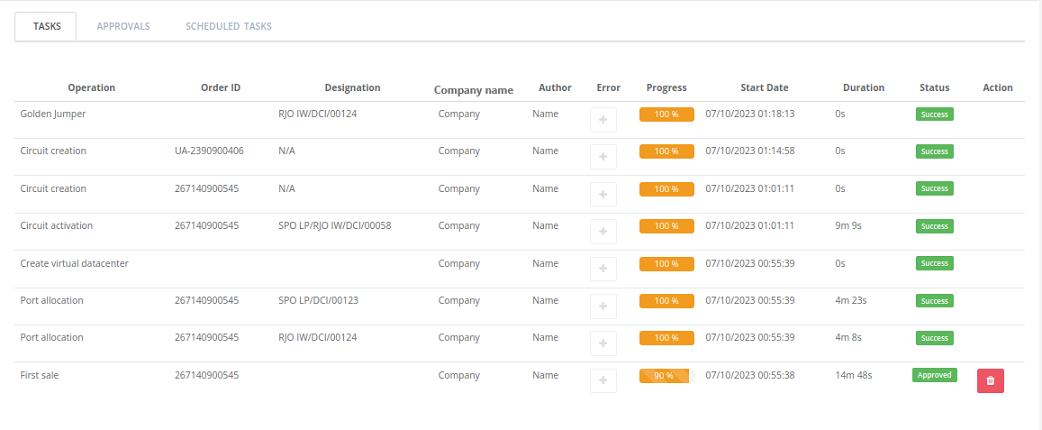
The «Tasks» tab shows eleven types of information divided into columns:
Operation;
Order ID;
Designation;
Business name;
Author;
Error;
Progress in percentage;
Start date;
Duration;
Status;
Action.
Detailing the status column that shows three different states.
They are
Success,FailorApproved.
The objective of this status is to direct the tracking action, according to the following:
Success status - shown green-colored, means that the operation was concluded with success.
Fail status - displayed in the color red, means that an error occurred during the operation. On the failed task itself it is possible to verify what was the reason for the irregularity, through the «Error» column.
Approved status - presented in green, means that the operation occurred with success. Although it depends on a user action, whether it is «admin» or «user».
For cases such as «First Sale», the Golden Jumper confirmation of both ports is pending from the user.
For the cases of subsequent sales of ports, the Golden Jumper of the port in question is pending.
Conclusion
This document presented a brief description of the functionalities contained on the Data Center Interconnect - DCI product, developed by the Ustore.
DCI Functionalities manual - v.5 - Updated 09/28/2023 - Reviewed 08/03/2023 - Created on 08/02/2023.